
Apple Vision Pro Simulator - visionOS 1.0 Beta 1
Codename N301

Apple recently released the first beta of visionOS 1.0 SDK which includes an Apple Vision Pro simulator. Now Apple has disabled many features and apps in the simulator but I was able to dive into the code to find a few interesting lines of copy.
Highlights
The device will pop up with a warning if it overheats
Listing of existing Environments and that new Environments can be downloaded
Guest Mode details
Warnings if the user is moving too fast which might point to lack options for fitness apps in near future
New & Updated Apps
Capture.app
Capture.app is the camera app.
"Press the top button to capture spatial videos or photos."
"Recording Head-Up Display"
"Capture Reticle"
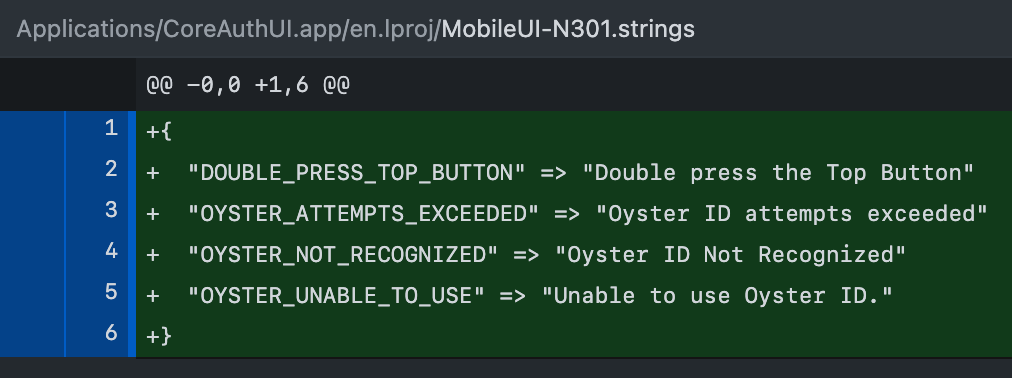
CoreAuth.app
CoreAuth.app has been updated for Optic ID, codename Oyster.
“Double Tap the top button” to authorize an action using Optic ID like presumably Apply Pay.
Settings.app
"Dynamic Lens Display"
"Sign in to your Apple Vision Pro"
"People Awareness"
"Connect to the Internet to sign in to your Apple Vision Pro."
"Optic ID & Passcode"
RealityBreakthrough.app
"%@ shows immersive visuals. Look around you to be sure there are no objects you might bump into or trip over."
"Check for Objects"
RealityChrome.app
"Move to Direct Touch Range"
"Move to Indirect Interaction Range"
"SharePlay content will be automatically shared with this group in FaceTime."
"Sharing Options"
"Share My Entire Window"
"App Placement Bar"
"App Resize Bar"
RealityControlCenter.app
"Environments"
"Control Center"
visionOS Control Center with all options available in the simulator activated via Settings:

Plus Guest Mode details:
“Allow others to use your Apple Vision Pro. Once started, the mode will end if it’s not put on within 5 minutes”
Video:
https://twitter.com/SteveMoser/status/1671656387670159360?s=20

RealityCoverSheet.app
"Press and hold the crown to adjust lenses" (To adjust IPD)
"Adjust Lenses"
"Press and hold the pill to move lenses apart"
"Device permanently locked"
"Turn the Digital Crown to exit."
"Press and hold the Digital Crown to align."
"To move outward, press and hold the top button."
"Your eyes are close to the display. Check your Light Seal fit."
"Quadruple Press the Side Button to Perform Input Recovery"
"Your passcode is required to enable Optic ID"


RealityGuestSetup.app
There is a separate app for setting up a guest’s gaze and hand tracking details.
"Calibrate Gaze"
"Enroll Hands"
"Enroll Prescription"
"Gaze and hand data will be stored temporarily and locally on your device. Data will be deleted once you’ve completed your session."
"Input Enrollment"
"Prescription Details"
"Delete Gaze Data"
"Are you sure you want to delete gaze data? This may result in reduced input performance on the device."
"Are you sure you want to delete hands data? This may result in reduced input performance on the device."
RealityLauncher.app
RealityLauncher looks like the Home Screen for visionOS. It seems to have FaceTime (or FaceTime 3D?) built in.

"Avatar Enrollment" (The dev name for Digital Persona’s?)
"Compatible Apps"
"Your recent contacts will appear here when you make or receive a FaceTime."
"If an app doesn’t respond for a while, select its name and click Force Quit."
"Device will shut down in %@ second(s)."
Sidecar.app
Sidecar has been updated to support "Mac Virtual Display".
Muse.app
Looks like Apple Vision Pro will be able to describe what is in a user’s view and control VoiceOver via face gestures.
"Are you sure you want to restart your device?"
"Accessibility features provide accommodations to allow you to control Apple Vision Pro."
"When enabled, background sounds will stop when Apple Vision Pro is locked"
"Eye Blink"
"Face Gestures"
"Mouth Open"
"Mouth Pucker"
""Describe Passthrough" requires Image Captions to be enabled in Settings Accessibility > VoiceOver."
"Exploration Style"
"Typing Mode"
"Smile"
"Tongue Out"
"Hold your left index finger pinch and pinch your right index finger or middle finger to adjust the value."
"Use a left index or right ring pinch to collapse"
"Hold your left index finger pinch and pinch your right index finger or middle finger to select a custom action, then use a left index or right ring pinch to activate."
"Use a left index or right ring pinch to toggle link"
"Use a left index or right ring pinch to expand"
"Use a left index or right ring pinch to view math in full screen"
"Use a left index or right ring pinch to activate the picker"
"Use a left index or right ring pinch to toggle setting."
"Use a left index or right ring pinch to edit."
"Use a left index or right ring pinch to play or pause."
"Describe App Location"
"Move Focus to Gaze"
"Begin Passthrough Gesture"
"Enter Direct Gesture Mode"
"Start Gaze Exploration"
Settings
"Find My Apple Vision Pro"
"Your health and fitness information on this Apple Vision Pro can be automatically stored in iCloud.”
"Choose how you would like to view your device. Windows and controls will appear larger or smaller."
"Automatically adjust the Environment appearance based on your time of day, or choose a default."
"Control the volume of the sounds that emit from the Environment."
"You can redo your eye and hand setup anytime by pressing the top button four times.
"Apple Vision Pro will guide you through adjusting the view to your pupils. You can adjust further for comfort."
"Apple Vision Pro can detect when lenses are in and switch settings automatically.”
"Maximum number of lenses already set up with Optic ID."
"Reset Optic ID for Lenses"
"Set Up Lenses with Optic ID"
"All data associated with this prescription will be removed."
"In Safari and supported search fields, focusing your eyes on the Dictation microphone will start Dictation."
"Optic ID will always be available if “%@” is nearby and has been unlocked in the past 15 minutes."
"Nearby iPhone Enables Optic ID"
"Optic ID will unlock Apple Vision Pro when you are not using lenses."
"Resetting will delete all existing Optic ID data and will delete your Honest Representation."
"To set up Optic ID for other lenses, place them in Apple Vision Pro and press the top button four times."
"Turn off Optic ID for Honest Representation"
"Turning off your passcode will result in your honest representation getting deleted."
"Your saved passwords, credit cards, and important data can be viewed and used by anyone who has access to your Apple Vision Pro if you turn off passcode lock. Turning off your passcode will result in your honest representation getting deleted."
"Environments and Immersive Apps"
"People Awareness shows people nearby. Visibility depends on your motion, their distance, and settings enabled."
"People nearby will only be visible through Environments and fully immersive apps, including virtual reality games."
"Applications that have requested the ability to use Hand Structure & Movements will appear here."
"Applications that have requested the ability to use Surroundings will appear here."
"Capture your representation for FaceTime. This will take a few minutes to complete."
"Your representation is unavailable while Travel Mode is on." (What is Travel Mode?)
"An incorrect fit could cause injury. Go to apple.com/lightseal to learn more."
"Are you on an airplane?"
"Dwell Control allows you to dwell the pointer to interact with your device."
"Pointer Control replaces eyes with another input like head direction."
"Zoom is a powerful built-in magnifier that lets you enlarge your virtual content."
"Double-press Digital Crown to continue without lenses"
“Virtual content has been temporarily hidden until you return to a safe speed.”
"Moving at Unsafe Speed"
"You're too close to an object, move back”
"The system is operating at high temperatures. Closing applications by double-tapping the crown may improve your experience."
RealityHUD.app

"Collapsed System Menu"
"Connected to Hotspot"
"Privacy Indicator"
RealityEnvironment.app
Environment’s dev or non-marketing internal test name is Simulated Scenes

"Share your Environment with other people in FaceTime 3D"
"Environment Volume"
"Environment not downloaded."
Environment codenames:
"Bat_displayName" => "Sky"
"Beluga_displayName" => "Beach"
"Finch_displayName" => "Fall Light"
"Hippo_displayName" => "Haleakalä"
"Jaguar_displayName" => "Joshua Tree'
"KitchenDay_displayName" => "Kitchen (Day)"
"KitchenNight_displayName" => "Kitchen (Night)"
"LivingRoomDay_displayName" => "Living Room (Day)"
"LivingRoomNight_displayName" => "Living Room (Night)"
"Lobster_displayName" => "Lake Vrangla"
"Mole_displayName" => "Mount Hood!
"Moose_displayName" => "The Moon"
"MuseumDay_displayName" => "Museum (Day)"
"MuseumNight_displayName" => "Museum (Night)"
"Sparrow_displayName" => "Spring Light"
"Starfish_displayName" => "Cinema"
"Swan_displayName" => "Summer Light"
"Wolf_displayName" => "White Sands"
"Wren_displayName" => "Winter Light"
"Yak_displayName" => "Yosemite"
AccessibilityMRServer.app
AccessibilityMRServer.app seems to be a way to try out VoiceOver
“To learn more about VoiceOver on Apple Vision Pro, pinch your left hand's index finger against your left thumb and then release.”
“If you are familiar with VoiceOver, long pinch your right hand's middle finger against your right thumb.”
“To turn VoiceOver off, press the Digital Crown."
“To move the VoiceOver cursor to the next item, pinch your right hand's index finger against the thumb and then release. Use VoiceOver now to perform the next element gesture.”
"To move the VoiceOver cursor to the previous item, pinch your right hand's middle finger against the thumb and then release. Use VoiceOver now to perform the previous element gesture."
“Use VoiceOver to navigate around the controls in the practice area. When you are done, find and activate the Next Page button.”
“To activate a control, pinch your left hand's index finger and then release. Use VoiceOver now to perform the activation gesture.”
“Learn advanced Apple Vision Pro skills”
“In this collection, learn some advanced tools of VoiceOver on Apple Vision Pro”
“Return home to revisit the other collections.”
“You've completed Advanced VoiceOver Tools on Apple Vision Pro!”
“Learn additional VoiceOver gestures”
“In this collection, learn more about the VoiceOver commands”
“You can switch the hands used for VoiceOver gestures so gestures like navigation are on the left hand and gestures like activation are on the right hand. You can switch the handedness using the toggle below. Practice navigating and activating the elements under the toggle after making this change.”
"You can explore content using your head as a pointer. To start, pinch down your right index finger and thumb. While holding, move your head around and listen to VoiceOver describe the content at your head's gaze. To practice, explore until you find the Next Page button."
"Continue on to the VoiceOver Basics collection."
"VoiceOver can describe the scene in the passthrough view. To generate an image description for the view, pinch your right ring finger against your right thumb twice. To turn on image descriptions, toggle on the setting in the practice area below."
"Image Descriptions will be available once the Apple Vision Pro is connected to the internet. Enable Image Descriptions in the VoiceOver settings."
"Pinch your left hand's index finger against your left thumb and release."
"The VoiceOver Rotor provides a quick way to navigate the content of an app. To move through items in the rotor, hold down your left index finger, and then using the next and previous element gestures on your right hand. To move between the different rotor options, hold down your left middle finger, and then using the next and previous element gestures on your right hand. Use VoiceOver to navigate between different headings in the practice area. When you are done, activate the Next Page button."
"You can quickly navigate across long-form content by scrolling. To start scrolling, pinch your right hand's index finger against the thumb, and move the pinch in the direction you want to scroll. Release the pinch when the scroll is complete. Use the practice area to scroll in different directions. When you are done, activate the Next Page button."
"You can assign specific vocal sounds to VoiceOver commands. To add a sound action for a VoiceOver command, navigate to the VoiceOver settings page and select 'Commands'. Next, select the command within the 'All Commands' tab and select 'Add Gesture'. Use the toggle below to download the model for sound actions."
"Sound Actions will be available once the Apple Vision Pro is connected to the internet. Enable Sound Actions in the VoiceOver settings."
"To move to the next application, hold your left ring finger, and use the next element gesture on your right hand. To move to the previous application, again hold your left ring finger, and use the previous element gesture on your right hand. Use the practice area to practice the application switching gesture. When you are done, activate the Next Page button."